

 This post is one chapter of a MegaFeature!
< Prev. | Contents | Next >
While, as we’ve already seen, much of Escha and Logy’s time in their own game is spent living the corporate life and doing things that other people tell them to do, there are times when the pair of them have to take their own initiative.
We’ve already looked at how this works inside their workshop; today it’s time to take a closer look at their work out in the field, and particularly at how they fend off the foes they encounter during their investigations.
Yep, it’s combat time again; make sure you’ve got a basket full of bombs, ’cause we’re going to be out for a while!

Like the last few games in the Atelier series that we’ve looked at, combat in Atelier Escha & Logy: Alchemists of the Dusk Sky is more a case of evolution than radical reinvention — but as always, there are a few interesting and unique aspects to enjoy along the way.
As has been the case for some time in the series by this point, the game makes use of a “symbol attack” system, whereby enemies are visible on the field, and striking them with the protagonist’s weapon causes you to enter battle with an advantage. And as usual, later in the game, you unlock the ability to immediately defeat weaker enemies with your weapon’s swing.
The basic combat in Atelier Escha & Logy: Alchemists of the Dusk Sky builds on the battle system in Atelier Ayesha: The Alchemist of Dusk in that positioning and formation is a consideration in battle. It’s a consideration for a slightly different reason here, though; rather than placing an emphasis on getting behind enemies and striking them from there for additional damage and accuracy, your character formation is instead relevant when it comes to the front and back rows of your party.

In Atelier Escha & Logy: Alchemists of the Dusk Sky, you have three party members in the front row, and three in the back; any additional members are in your “reserves” and are not used in battle at all until you switch them into one of the six active slots outside of combat.
During combat, you are able to use a character’s turn to switch them with their back row counterpart — though the twist is, the back row is arranged behind the front row’s initial starting positions, which are laid out in a triangle formation surrounding the enemies. That means if a character is in the wrong position, they might struggle to swap with the character you want. On the flip side, though, having two front-row characters sharing one of the “points” of the triangle means that either can switch with their back row counterpart when their turn rolls around.
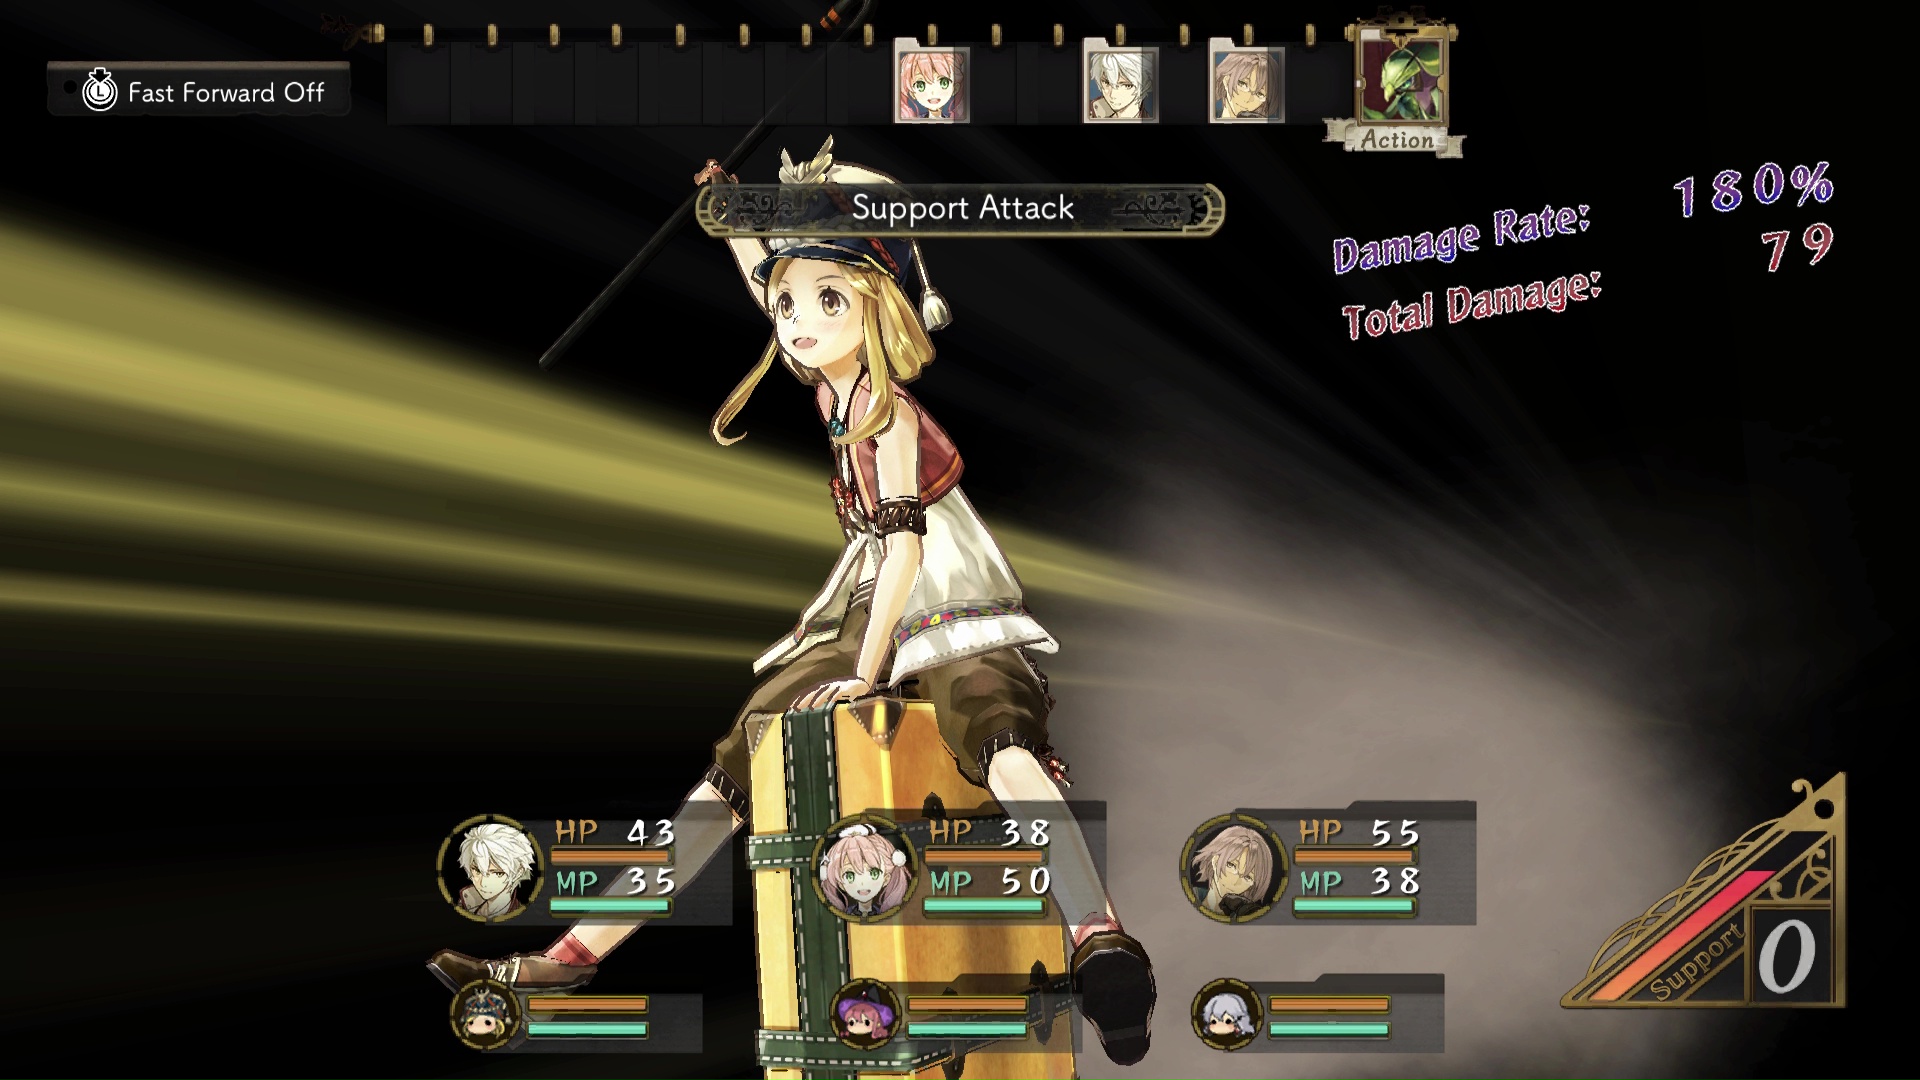
Like the last few Atelier games, there’s a “Support” mechanic in place which allows characters to perform follow-up attacks or defend their allies. This time around, it eschews Atelier Ayesha’s system of having a gauge for each party member in favour of a shared gauge that the whole party needs to use.

While there are charges in the gauge (or, in the case of some abilities, partial charges), you can follow up attacking maneouvres — including basic attacks, skills and alchemy item usage — with additional attacks from other party members and continue doing so until you run out of charges. Play your cards right and you can actually get all six party members to get a shot off before the enemy has a chance to take an action, since the support gauge recharges a little with every successful hit, regardless of whether it was from a “proper” turn or a support action.
Initially, that’s all there is to it, but making use of the “Research” facility in Escha and Logy’s office allows you pay some of your earned Cole to power up these abilities somewhat. Once you’ve done this, each character gets a more powerful support attack that is distinct to their “role” in the party as a whole; strong characters such as Linca get a powerful, single-target hit that has the potential to knock an enemy back in the turn order, for example, while healers and mages such as Lucille and Wilbell have area-effect attacks that chip away at an entire group of enemies.
There’s an incentive to chain these support combos together for as long as possible: each successful action in the chain increases the percentage of normal damage that is applied on each attack. And, after a certain point in the game, if this gauge crosses the 200% threshold, the next support attack will be a powerful, character-specific special attack that has the potential to do a huge amount of damage. Organising your strategy so you can do this as often as possible is an important part of challenging some of the tougher foes in the game.
At the same time, you shouldn’t neglect the fact that the support gauge can also be used for characters to defend one another. When a character is targeted with an attack, you have a fairly generous window of time where you can tell one of the other characters in the party to take the hit in their stead. Not only does this completely prevent the protected character from taking any damage, the damage that the defending character takes is somewhat reduced from the normal level, too.
Support defence manoeuvres can also be used as a means of switching and moving characters — though once again formation comes into play here. Let’s say the front row consists of Escha, Logy and Wilbell, and they’re all standing on different points of the “triangle”. Escha gets targeted by an attack — at this point you can get Logy or Wilbell to defend her, which means they’ll move onto the same “point” as she’s on, or you can get the character in the back row for that “point” to swap with her.
There’s actually a surprising amount of tactical flexibility in the combat, and if you want to take down some of the optional bosses towards the end of the game, you’ll need to make good use of all these systems in order to progress.

On top of this, each character (except Escha and Logy) has a unique “Finishing” move, which gradually charges up as they perform actions in battle — including support actions. When this reaches maximum, they can perform their Finisher; if the Finisher is sufficiently powerful to actually finish an enemy, you’ll get a unique extended animation with its own theme music, which is always an incredibly satisfying way to bring a tough fight to a close.
Escha and Logy, being alchemists, of course get special treatment. After making a specific amount of progress in an important main quest in the story, they gain the ability to cooperatively use items as support actions for one another — and the best thing about this is that they don’t need to consume the support gauge in order to do so.
The way it works is similar to the normal use of support actions in combat — there must be at least a charge in the support gauge before you can pull it off, since although Escha and Logy don’t need a charge to use their item, there must be another character’s support attack in between them.

Once you’ve met that simple condition, on either Escha or Logy’s turn, you have the option to choose an attacking item for both of them to use; after that, the first of the two will use their item, then this must be followed up by as many support attacks as you can fit in, ideally bumping up the damage percentage as much as you can in the process.
When you’re ready to finish the combo — or you’ve just run out of support charges — you can set off the other alchemist’s item, which will be used in a more powerful form, similar to how Meruru could use her “Potentialise” ability in her own game.
Combat, then, becomes a balancing act of keeping your characters safe and finding opportunities to unleash as much hell as possible in as short a timeframe as possible. Ideally you want to keep both Escha and Logy off healing duty as much as possible, because their items have some of the most devastating effects in the game; to encourage this, the character Lucille from the original release of Atelier Escha & Logy: Alchemists of the Dusk Sky has healing and KO recovery skills — and in the Plus and DX versions, a character who will be familiar to fans of Atelier Ayesha: The Alchemist of Dusk was added to the playable lineup, too, with her own healing and recovery abilities.

For much of the game, if you stay on top of your item production and equipment upgrading, most of the combat won’t present too much of a challenge. But as you approach the grand finale of the main story — and the numerous optional objectives you can complete in the run-up to the game’s final day — you’ll discover you’ll need to make very good use of everything that you learned if you want to survive.
There’s also an interesting twist when it comes to the optional bosses you can either fight as part of your investigations, or by investigating each area sufficiently: many of these battles will open with a randomly determined buff or debuff for you, the enemies or both, requiring you to adjust your strategy on the fly to compensate for these effects! These tend not to show up in anything mandatory to actually complete the game’s narrative… but given that you have pretty much a full year to do with as you see fit at the end of the game — and it’s quite possible to beat the final boss of the main story very early in that year — you’ll almost certainly encounter them before long.
And if you have trouble surviving? Well, it’s back to the workshop to iterate on your designs, make things better — and try, try, try again, of course!
This post is one chapter of a MegaFeature!
< Prev. | Contents | Next >
More about Atelier Escha & Logy: Alchemists of the Dusk Sky
More about Atelier
If you enjoyed this post, please consider supporting the site via any of the services below or the Donate page here on the site! Your contributions help keep the lights on, the ads to a minimum and my shelves stocked up with things to write about!
![]()


3 thoughts on “Atelier Escha & Logy: Alchemists of the Dusk Sky – Battles at the End of the World”